Tools
A sharp modeling knife (scalpel), two kinds of tweezers with sharp gripping surfaces to allow
precision, several wooden sticks with various kinds of tips (rounded, pointed), a water soluble
marker, a masking tape
|
|
|
Painting angle and paint properties
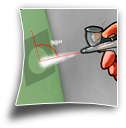
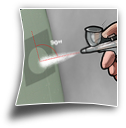
Keep these simple rules in mind when painting: Maintain a right angle between your airbrush (aerograph) and the surface you are painting. The paint
should be watered down a bit more than for ordinary painting, but it should not produce too thick a
layer.
|
|
|
Problematic colors
With some colors it may be more difficult to achieve full opacity, regardless of the paint quality etc.
Apply such paint prior to other colors to make sure you achieve the desired opacity and the layer is
not excessively thick.
|
|
|
Preparing the masks
Masks should not be stretched during the application process as they are flexible and this could
cause deformation. Remove the whole mask if necessary, and then apply again. Once placed on
the model, the mask surface should be adjusted to the surface of the model by tracing all the
indentations with a pointed wooden stick.
|
|
|
Painting methods
Try not to apply two coats of color at the edges of a mask. Instead, apply one color prior to painting
the proper camouflage, and apply the other color after the mask is back on. Otherwise, the coating
in the areas encased by the mask may be too thick, and after removing the mask the edges of the
lighter color may become visible.
|
|
|
When are masks better than decals?
The decals that are the easiest to apply tend to be prepared on relatively thick transparent film,
so the surface often needs to be painstakingly polished. Thin film, on the other hand, is prone to
wrinkling and cannot be easily softened with a liquid softener.
Painting using masks enables to showcase fine detail - such as rivets, thin lines etc. – much easier and
to a much better effect.
|
|
|
Also worth remembering
1. It is advised to clean parts of the model in hot water with a detergent. Cleaning the surface
and priming it with a preparatory coating (e.g. Gunze Surfacer 1200, Tamiya White Base)
dramatically improves paint adhesion, which is essential for masking.
2. Be sure to properly cover up the remaining part of the model. When painting with an
aerograph, some paint may end up on the uncovered parts of the model, and it may be
especially visible against a light backdrop.
3. Do not apply the top layer of paint. The resulting edge may be difficult to remove.
4. The edges where colors applied with masking meet may be treated with sandpaper (grit
2000-2500).
|
Apply the white color
Prior to applying the proper camouflage (in this case light blue) the spot designated for the emblem
should be painted white.
|
|
|
Prepare the Montex mask
Use the marker to paint straight lines on the emblem for orientation purposes. Apply a piece of
Montex film to the emblem, so that the star and the circle can be painted on.
|
|
|
Apply the color of the camouflage
|
|
|
Apply the navy blue color
Apply the external part of the mask around the circle, keeping the marker lines in mind. Remove the
film from around the star and mask the rest of the emblem with masking tape or with Montex film. Apply the navy blue paint.
|
|
|
|
|
|
Apply the white color
Prior to applying the proper camouflage, depending on the chosen Luftwaffe pattern, the spot
designated for the emblem should be painted white.
|
|
|
Prepare the Montex mask
Draw straight reference lines on the emblem, so that the pieces can be put together in a precise
manner. Apply a section of the Montex film so that the cross can be painted on.
|
|
|
Apply the color of the camouflage
|
|
|
Positioning the black areas
Remove part of the mask that covers up the areas to be painted black and apply mask around the
cross, then apply black paint.
|
|
|
|
|
|
Apply the white color
Prior to applying the proper camouflage (in this case black) the spot designated for the emblem
should be painted white.
|
|
|
Prepare the Montex mask
Draw straight reference lines on the emblem, so that the pieces can be put together in a precise
manner. Apply a section of the Montex film so that the emblem can be recreated.
|
|
|
The color of the camouflage
The bottom surface of one wing should be black, and the bottom surface of the other should be
bright blue.
|
|
|
The positioning of the remaining colors
Remove the mask covering up areas to be painted yellow and apply paint. Remember to mask the
remaining part of the element well. Then mask the yellow area and apply blue paint. Red should be
applied as the last color.
|
|
|
|
|
|
Apply the white color
Prior to applying the proper camouflage (in this case green) the spot designated for the emblem
should be painted white.
|
|
|
Prepare the Montex mask
Transfer the outline of the circle onto the model (the part covering the white area of the emblem).
|
|
|
Apply the color of the camouflage. Apply red paint.
|
|
|
Apply the proper camouflage color
After covering up the red area apply the proper camouflage color.
|
|
|
|
|
|
Apply the color of the camouflage
The proper color of the camouflage should be applied prior to painting.
|
|
|
Prepare the Montex mask
Apply the whole emblem to a model, including an additional stripe of film that holds the whole
emblem together.
|
|
|
Apply the color of the emblem
|
|
|
|
|
|
The color of the camouflage
Prior to painting the letters, the proper color of the camouflage should be applied.
|
|
|
Prepare the Montex mask
Transfer the pattern to the right spot on the model.
|
|
|
Apply the desired color of the code sequence
|
|
|
|
|
|